If you’re running a small business in the UK and looking to start selling products or services online, WooCommerce is one of the easiest and most cost-effective ways to get going.
Built to work seamlessly with WordPress, WooCommerce transforms your website into a fully functional online shop – no coding experience required.
In this beginner’s guide, we’ll walk you through how to set up WooCommerce in the UK, step-by-step. Whether you’re just starting out or looking to expand an existing site, we’ll cover everything from choosing a domain to setting up payment methods and shipping options.
Let’s get started.
- What is WooCommerce?
- WooCommerce: Pros and Cons
- Step 1: Set Up Your Website Hosting and Domain
- Step 2: Install WordPress and WooCommerce
- Step 3: Go Through the WooCommerce Setup Wizard
- Step 4: Configure Your Store Settings
- Step 5: Add Your Products
- Step 6: Set Up Payments
- Step 7: Configure Delivery and Returns Policies
- Step 8: setup & design your emails
- Step 9: Test Your Checkout Process
- Step 10: Launch Your WooCommerce Store!
- Bonus Tips for UK WooCommerce Stores
- Are There Alternatives to WooCommerce?
What is WooCommerce?
Before we jump into the setup, let’s quickly break down what WooCommerce actually is.
WooCommerce is a free WordPress plugin that turns any WordPress website into an e-commerce store. You can sell physical products, digital downloads, subscriptions, or even services. And because it’s open-source, it’s highly customisable and works well with thousands of themes and extensions.
It’s trusted by over 3.5 million websites globally, including many small businesses right here in the UK.
WooCommerce: Pros and Cons
| Pros | Cons |
|---|---|
| Free to use with no monthly fee | Can get expensive with paid extensions |
| Fully customisable and open-source | Requires some WordPress knowledge to set up |
| Integrates seamlessly with WordPress | Performance can slow down with too many plugins |
| Huge library of themes and plugins | Requires regular updates and maintenance |
| Large UK and global support community | No built-in support – relies on forums/docs |
| Supports both physical and digital products | Initial setup can be time-consuming |
Step 1: Set Up Your Website Hosting and Domain
To use WooCommerce, you’ll need a WordPress website. If you don’t have one yet, here’s how to get started:
1. Choose a hosting provider
Look for hosting that’s optimised for WordPress. UK-based businesses should consider providers with UK servers to improve speed and performance for local customers.
2. Register a domain name
Choose something simple, brandable, and easy to remember. Most hosting companies offer domain registration during the setup process.
Once your hosting and domain are ready, you’ll be able to install WordPress with one click and start building your store.
Step 2: Install WordPress and WooCommerce
Most good hosting providers include a WordPress installer in their dashboard.
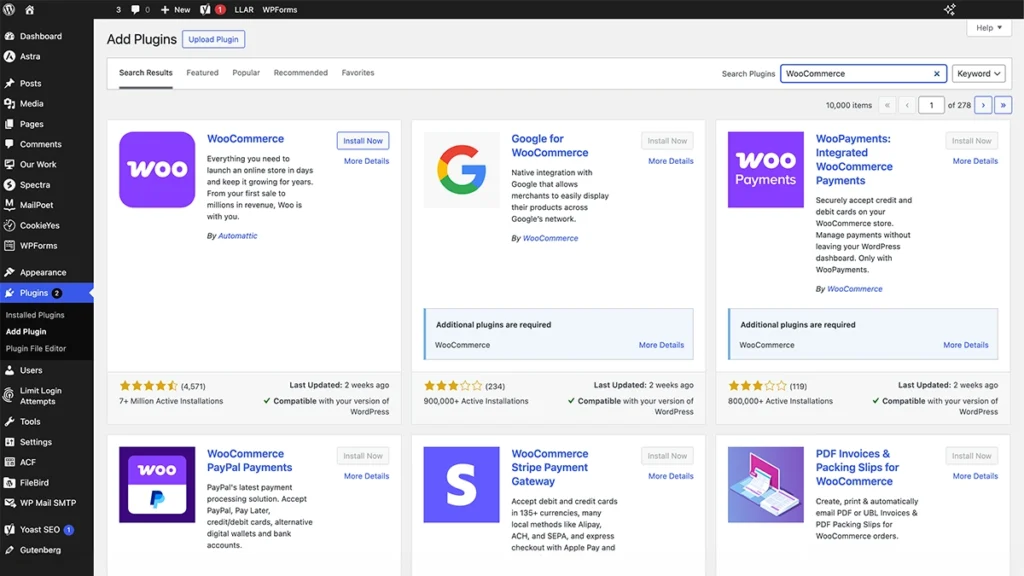
How to install WooCommerce:
- Log in to your WordPress dashboard.
- Go to Plugins > Add New.
- Search for WooCommerce.
- Click Install Now, then Activate.
Once installed, WooCommerce will launch a setup wizard to guide you through the basics.
Step 3: Go Through the WooCommerce Setup Wizard
The setup wizard helps you configure key settings for your store. Here’s what you’ll need to fill in:
- Store Details:
Enter your business address. If you’re UK-based, make sure your country/region is set to United Kingdom. This ensures correct currency, tax settings, and shipping zones. - Industry:
Choose the sector that best fits your business. This helps WooCommerce recommend features you might find useful. - Product Types:
Select whether you’ll sell physical goods, digital downloads, or services. You can also install extensions for subscriptions or bookings if needed. - Business Details:
WooCommerce will ask how many products you plan to sell and whether you’re setting up for a client. Answer honestly—this won’t affect functionality but helps tailor suggestions. - Theme:
You can start with a free WooCommerce-compatible theme like Storefront, or upload a custom one later. Make sure the theme is mobile-friendly and optimised for speed.
Step 4: Configure Your Store Settings
Now that WooCommerce is installed, it’s time to fine-tune your store.
1. Currency and Taxes
- Go to WooCommerce > Settings > General.
- Set Currency to Pound sterling (£).
- Under the Tax tab, enable taxes if you’re VAT registered.
- Use the built-in tax classes, or install a plugin like WooCommerce EU/UK VAT Compliance to handle VAT automatically.
2. Shipping Zones
- Head to WooCommerce > Settings > Shipping.
- Add a UK shipping zone with methods like flat rate, free shipping, or local pickup.
- Set delivery rates based on weight, location, or product type.
If you offer international shipping, add zones for countries you deliver to. Royal Mail and DPD plugins can help automate shipping options and labels.
Need help with setting up WooCommerce?
Check out our web design services for small businesses
Step 5: Add Your Products
Time to fill your store with products!
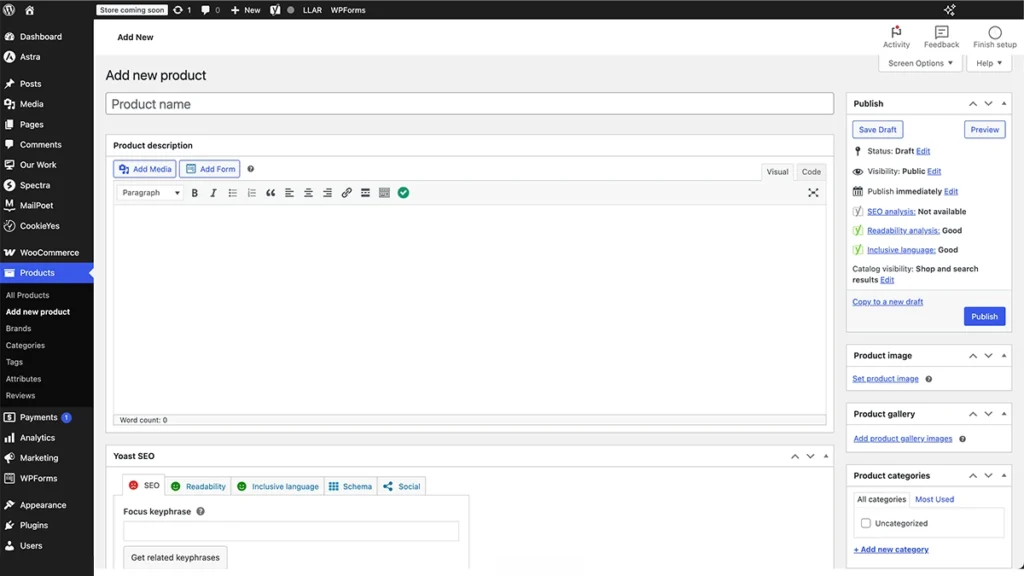
How to add a product:
- Go to Products > Add New.
- Enter a product name and detailed description.
- Add product images and gallery photos.
- Set a price and sale price if needed.
- Choose whether it’s a simple, variable, or grouped product.
- Assign a category and tags to help customers browse your shop.
Tip: Use high-quality product images and clear, benefit-focused descriptions to increase conversions.
Step 6: Set Up Payments
As a UK store owner, you’ll want to offer trusted payment methods your customers are comfortable with.
WooCommerce supports:
- PayPal
- Stripe (for credit/debit card payments)
- Apple Pay / Google Pay (via Stripe or plugins)
- Bank transfer
- Cash on delivery (for local pickup or delivery)
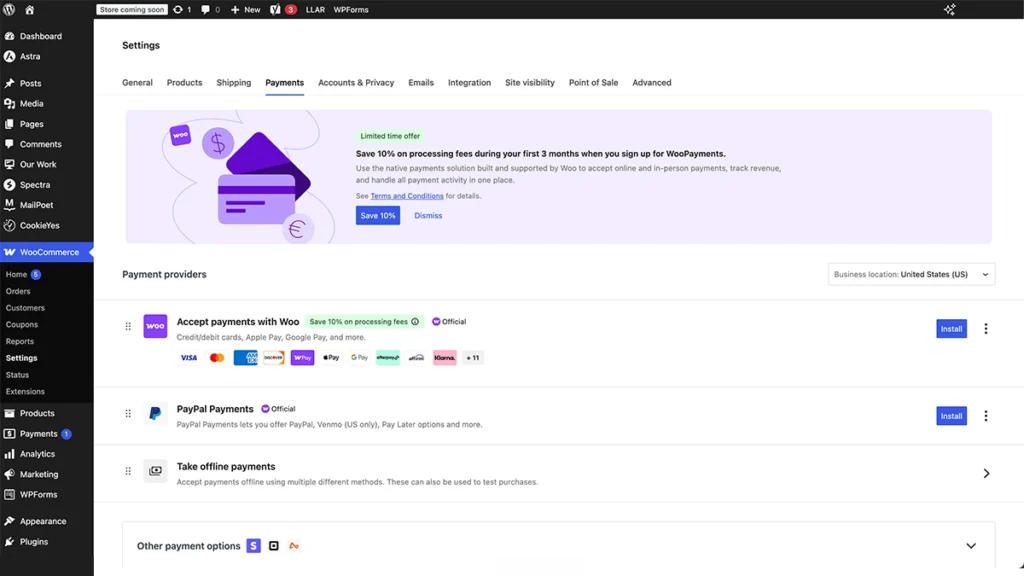
To set these up:
- Go to WooCommerce > Settings > Payments.
- Toggle on your chosen methods.
- Click Set up to enter your account details and preferences.
Stripe is highly recommended for UK users due to its simple setup, clean checkout, and support for 3D Secure compliance.
Step 7: Configure Delivery and Returns Policies
Trust matters, especially for small online stores. Adding clear delivery and return policies will help build confidence with your customers.
You can create these pages using WordPress:
- Delivery Information
- Returns & Refunds
- Terms and Conditions
- Privacy Policy
Link to them in your site footer or during checkout. This is also useful for GDPR compliance.
Step 8: setup & design your emails
Once your store is live, WooCommerce will automatically send transactional emails for actions like new orders, shipping updates, and password resets. These emails are important—they’re often the first direct communication your customer receives after making a purchase.
By default, WooCommerce emails are functional but quite basic. Customising them helps reinforce your brand and build trust with customers.
Where to Start
Go to WooCommerce > Settings > Emails. Here you can:
- View all the standard emails WooCommerce sends.
- Change the sender name and email address.
- Edit the email content and subject lines.
- Add your logo and brand colours.
This gives you a decent starting point, but if you want more control over the layout and design, you’ll need an email customiser plugin.
Best Plugins to Customise WooCommerce Emails
| Plugin | Features | Free Version? |
|---|---|---|
| YayMail | Drag-and-drop email builder, live preview, supports most Woo extensions | ✅ Yes |
| Kadence WooCommerce Email Designer | Customise default templates visually, match email styling to your site | ✅ Yes |
| MailPoet | Built-in WooCommerce email support, marketing automation, and newsletters | ✅ Yes |
| Email Customizer for WooCommerce (by ThemeHigh) | Easy-to-use editor with shortcode support | ✅ Yes |
Why YayMail?
YayMail is one of the most popular WooCommerce email customisers for good reason:
- Drag-and-drop builder (no coding required)
- Preview emails as you design them
- Supports third-party extensions like Subscriptions and Bookings
- Create mobile-friendly templates with ease
It’s perfect for small businesses who want emails that feel branded and professional without needing to hire a developer.
Pro Tips:
- Match your email fonts and colours to your website branding.
- Add your logo and contact details to the footer.
- Keep the tone friendly and consistent with your brand voice.
- Include links to social media or FAQs for extra engagement.
Step 9: Test Your Checkout Process
Before going live, place a test order to make sure everything works as expected.
Check:
- Product pricing
- Shipping calculations
- Tax application
- Payment gateway functionality
- Confirmation emails
Most payment gateways include a “test mode” so you can try this without spending real money.
Step 10: Launch Your WooCommerce Store!
Once you’ve set up your store, added your products, and tested everything, it’s time to launch.
Let your customers know via:
- Email announcements
- Social media posts
- Google Business Profile
- Flyers, posters, or packaging if you have a physical location
Consider running a special launch discount or free shipping offer to generate interest.
Bonus Tips for UK WooCommerce Stores
1. Stay Compliant
- If you’re registered for VAT, display prices with VAT included and provide proper invoicing.
- Add a cookie banner for GDPR compliance.
- Include company registration details in your site footer if you’re a limited company.
2. Enable Local Pickups
If you sell locally, WooCommerce lets you offer free local pickup, which saves on delivery costs and appeals to nearby customers.
3. Add Trust Signals
- Use product reviews and testimonials.
- Add security badges or payment icons.
- Link to your social profiles to show you’re a real business.
Are There Alternatives to WooCommerce?
While WooCommerce is the most popular choice, there are other WordPress-compatible plugins you can explore depending on your needs:
- Easy Digital Downloads:
Ideal if you’re only selling digital products like eBooks or software. - WP EasyCart:
A beginner-friendly eCommerce plugin with built-in features like coupons, subscriptions, and invoicing. - BigCommerce for WordPress:
Lets you manage your store on BigCommerce while displaying products on your WordPress site. - Ecwid Ecommerce Shopping Cart:
A simple plugin that adds a full-featured online store to any WordPress site with minimal setup.
These alternatives work entirely within WordPress, though WooCommerce remains the most flexible and widely supported option for UK small businesses.
Final Thoughts
Setting up WooCommerce in the UK might seem overwhelming at first, but once you break it down, it’s surprisingly manageable—even if you’re not tech-savvy. With the right tools and guidance, you can build a professional online store that grows with your business.
And remember, if you’re feeling stuck or want help designing a store that truly reflects your brand, we’re here to help. At 404 Marketing, we work with UK startups and small businesses to launch beautiful, functional, and effective e-commerce websites using WooCommerce.
Need Help with Your WooCommerce Store?
Get in touch for a free discovery call and let’s chat about how to get your online shop up and running the right way. Whether you need help with the setup, design, or digital marketing, we’ve got your back.